| |
 |
 |
home |
> |
м ңн’ҲмҶҢк°ң |
> |
кҙ‘н•ҷнҳ„лҜёкІҪ |
> |
LASER CONFOCAL нҳ„лҜёкІҪ |
> |
OLS4100 |
|
|
| |
| LASER CONFOCAL нҳ„лҜёкІҪ |
| OLS4100 |
| Superior Metrology |
| |
Wider Sample Range
Imaging Slopes up to 85В° |
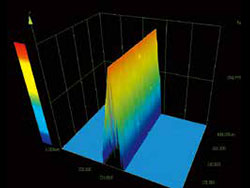 |
Thanks to dedicated objective lenses with high numerical apertures and a dedicated optical system that obtains superior performance from a 405 nm laser, the LEXT OLS4100 can reliably measure acute-angled samples that were previously impossible to measure. This improves to measure micro roughness on a non-level surface. |
| Razor with an Acute Angle |
 |
 |
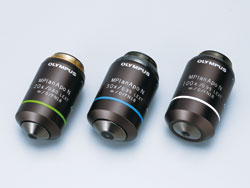
| LEXT-Dedicated Objective Lenses |
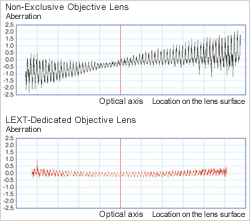
Minimized Aberrations with Dedicated Lens |
| |
|
| Micro-Profile Measurements with 10 Nanometer Height Resolution |
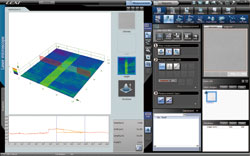 |
Thanks to a short-wavelength 405 nm laser light and a higher-aperture objective lens, 0.12 micron meter XY resolution is available. As a result, the OLS4100 can perform submicron measurements of a sample's surface. With a high-precision 0.8 nanometer-resolution linear scale and software algorithm such as our original I-Z curve (see page 23), the OLS4100 can resolve height differences on the order of 10 nanometers. |
(MPLAPON50XLEXT)
STEP Height standard Type B, PTB-5, Institut fГјr Mikroelektronik, Germany, 6 nm Detection in Height Measurement |
| |
|
| Overcoming Reflectance Differences |
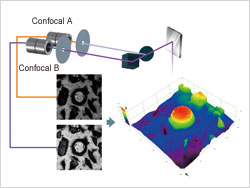 |
The OLS4100 employs a dual confocal system, incorporating two confocal optical systems. In combination with a highsensitivity detector, this enables the OLS4100 to capture a clear image from a sample consisting of materials with different reflectance characteristics. |
Diamond Electroplated Tool
Objective Lens: MPlanApoN50xLEXT |
| |
|
Applicable to Transparent Layers
Multi-Layer Mode |
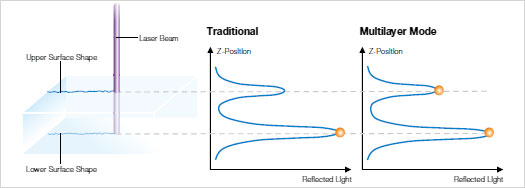
| The LEXT OLS4100's new multi-layer mode is capable of recognizing the peaks of reflected light intensities of multiple layers and setting each layer as the focal point, making it possible to observe and measure the upper surface of a transparent sample, as well as to analyze multiple layers and measure the thickness of each layer. |
 |
| |
|
| Observation/Measurement of Multiple Layers of Transparent Material |
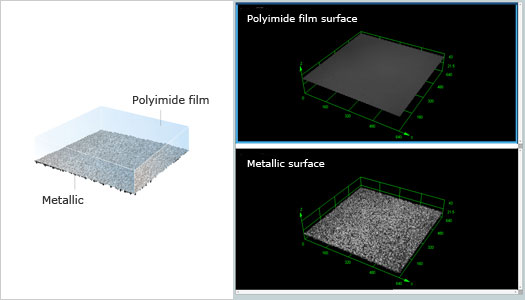
| The multi-layer mode facilitates observation and measurement of the transparent layer at the top surface of a transparent sample. Even with a transparent resin layer on a glass substrate, the shape and roughness of each layer as well as the thickness of the surface film can be measured. |
 |
| |
|
| Industry's First* Double Performance Guarantee |
| |
|
| Accuracy and Repeatability |
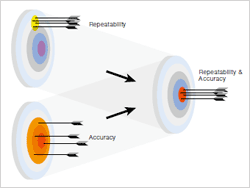 |
The performance of a measuring tool is typically expressed using two different terms: "accuracy," which indicates how close a measurement value is to its true value, and "repeatability," which indicates the degree of variations among repeated measurement values. The OLS4100 is the industry's first* laser scanning microscope able to assure both accuracy and repeatability. |
| |
|
| Traceability System |
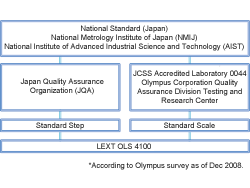 |
The OLS4100 uses a rigorous system of production for every component. From the objective lens to the laser head, Olympus delivers only the highest-quality systems based on comprehensive inspection to the strictest standards. On delivery, final adjustment and calibration is performed by qualified engineers in the actual measurement environment. |
| Accuracy and Repeatability |
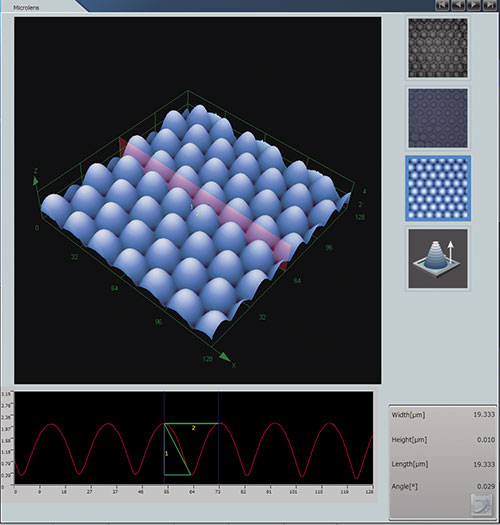
| Step Measurement |
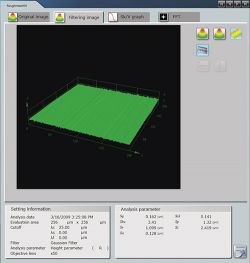
Surface Roughness Measurement |
 |
 |
| This mode allows measurement of a step between any two arbitrary points on a surface profile. Profile Measurement is also available. |
This mode allows measurement of line roughness on one line and plane roughness on the entire surface.
|
| |
|
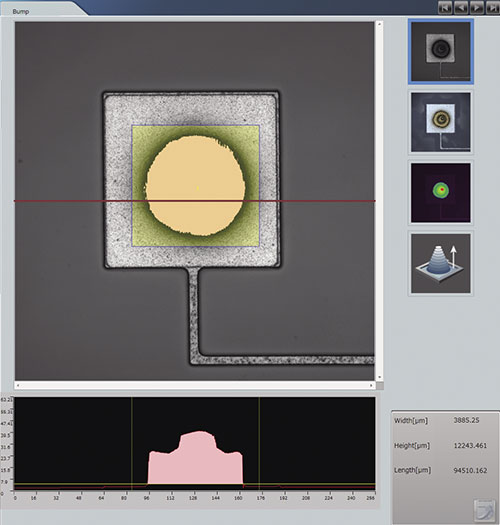
| Area/Volume Measurement |
Particle Measurement (optional) |
 |
 |
| With a user-defined threshold level on a surface profile, this mode allows measurement of the volume (or area) of a geometry above or below the threshold level. |
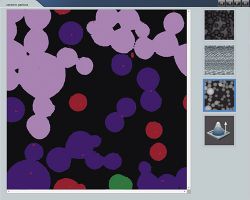
This mode enables auto-separation of particles with the separator function, setting of a threshold level, and setting of a detection range within a region of interest. |
| |
|
| Geometric Measurement |
Film Thickness Measurement (optional) |
 |
 |
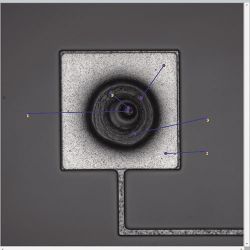
| This mode allows measurement of the distance between two arbitrary points on a geometric image. The geometric shape and angle for circle, rectangle, etc. are measured. |
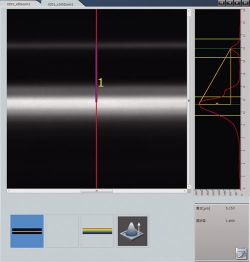
This mode allows the thickness of a film on a transparent body to be measured by detecting changes in refractive index. |
| |
|
| Auto Edge Detection/ Measurement (optional) |
 |
|
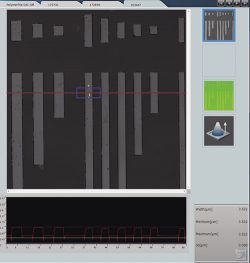
| This mode allows a line width or a diameter to be measured by automatically detecting edges in a geometric image. This reduces uncertainty by eliminating operator error. |
|
|
| |
|
OLYMPUS Stream (optional)
Workflow Solution for Improved Image Analysis Performance |
For grain size analysis or nonmetallic inclusion rating, optional OLYMPUS Stream microimaging software is available, which can be uploaded directly from the OLS4100.
Learn more about the OLYMPUS Stream > |
| |
|
Improved Roughness Measurement
LEXT OLS 4100 Parameters |
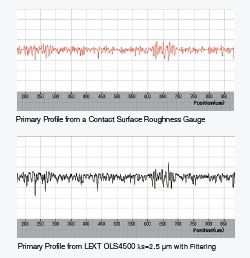
| The LEXT OLS4100 has been developed to represent a new standard of surface roughness measuring. The OLS4100 is calibrated in the same way as contact surface roughness gauges and has the necessary roughness parameters and filters required per ISO and JQA. This allows users with contact surface roughness gauges to obtain output results from the system consistent with their existing instruments, with the advantage of greater speed and non-contact measurement. The OLS4100 has a roughness-specific mode enabling roughness profile measurement for sample lengths up to 100mm with an automatic line stitching function. The OLS4100 comes with the same Surface Profile Parameters as contact-type surface roughness gauges, offering compatible operability and measurement results. |
| |
|
| Primary Profile |
Pp, Pv, Pz, Pc, Pt, Pa, Pq, Psk, Pku, Psm, PО”q, Pmr(c), PОҙc, Pmr |
| Roughness Profile |
Rp, Rv, Rz, Rc, Rt, Ra, Rq, Rsk, Rku, Rsm, RО”q, Rmr(c),RОҙc, Rmr, RZJIS, Ra75 |
| Waviness Profile |
Wp, Wv, Wz, Wc, Wt, Wa, Wq, Wsk, Wku, Wsm, WО”q, Wmr(c), WОҙc, Wmr |
| Bearing Area Curve |
Rk, Rpk, Rvk, Mr1, Mr2 |
| Motif |
R, Rx, AR, W, Wx, AW, Wte |
| Roughness Profile (JIS 1994) |
Ra(JIS1994), Ry, Rz(JIS1994), Sm, S, tp |
| Others |
R3z, P3z, PeakCount |
|
| |
|
| Accommodating Next-Generation Parameters |
| The OLS4100 comes with roughness (3D) parameters conforming to ISO25178. By evaluating the planer area, high-reliability analysis is made possible. |
| |
|
| Amplitude Parameters |
Sq, Ssk, Sku, Sp, Sv, Sz, Sa |
| Functional Parameters |
Smr(c), Sdc(mr), Sk, Spk, Svk, SMr1, SMr2, Sxp |
| Volumetric Parameters |
Vv(p), Vvv, Vvc, Vm(p), Vmp, Vmc |
| Lateral Parameters |
Sal, Str |
|
| |
|
| LEXT OLS4100 has compatibility with results of a surface roughness gauge. |
 |
|
| |
|
| Micro Roughness |
|
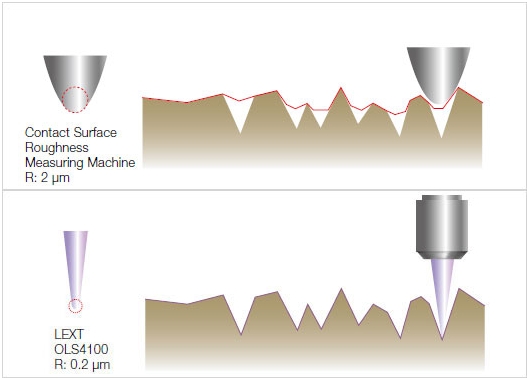
| Contact surface roughness gauges cannot measure micro surface contour less than the stylus tip diameter. The OLS4100 can measure the surface roughness of micro geometries at high resolution due to a minute laser spot diameter. |
 |
| |
|
| Non-Contact Measurement |
|
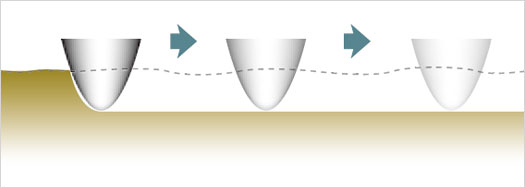
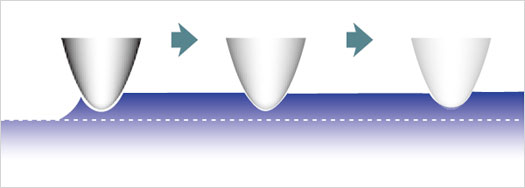
| Since a contact surface roughness gauge uses a hard needle-shaped stylus, it is more likely to scratch the surface of a soft specimen, damaging or deforming it. With adhesive specimens, on the other hand, the stylus can attach to the specimen and be damaged when pulled loose, making it impossible to obtain correct results. The OLS4100, a noncontact laser microscope, can perform accurate surface roughness measurement regardless of surface texture conditions.
|
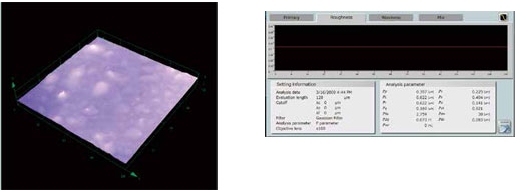 |
| Polymer Film 3D image |
|
| |
|
 |
| Soft Specimen |
|
| |
 |
| Adhesive Specimen |
|
| |
|
| Measurement of Features at the Micron Level |
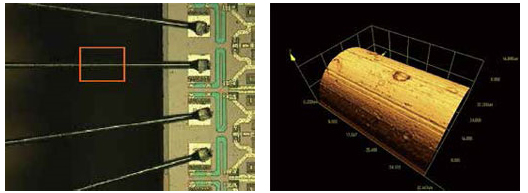
| Surface roughness gauges cannot measure micron-level features since their styli are not able to access these areas. The OLS4100 can correctly identify a measuring position and easily perform roughness measurement of a target micro area. |
 |
| Bonding Wires |
|
| |
|
| High-Quality Imaging |
Crystal-Clear 3D Color Images
Three Types of Integration Images |
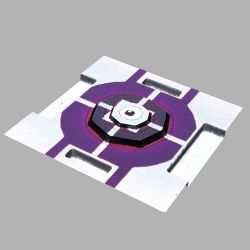 |
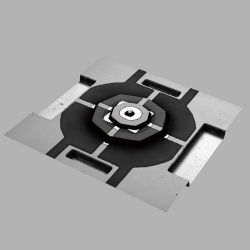
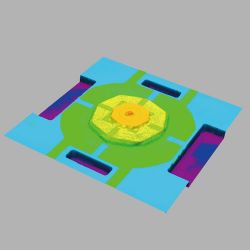
The LEXT OLS4100 can acquire three different types of information at the same time: a true-color optical microscope image, a laser microscope image, and height information. The OLS4100 makes it possible to capture an optical microscope image consisting of in-focus pixels only and integrate them with a true-color optical microscope image and height information. |
| Real-Color 3D Image |
|
| |
|
 |
 |
| Confocal 3D Laser Image |
Height Information |
| |
|
| Natural Color Reproduction |
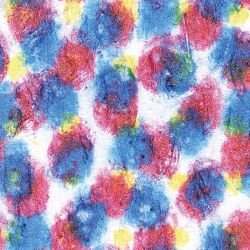
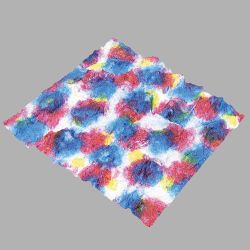
| The OLS4100 uses a white LED light and a high-color-fidelity CCD camera to generate clear, natural-looking color images, comparable to those obtained with high-grade optical microscopes.
|
 |
 |
2D Color Image (Inkjet Dots on Paper,
Objective Lens 20x) |
3D Color Image (Inkjet Dots on Paper, Objective Lens 20x) |
| |
|
| Realistic Surface Reproduction, Laser DIC (Differential Interference Contrast) |
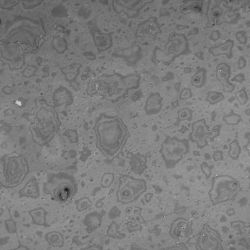
| Differential Interference Control (DIC) is an observation method used to visualize nanometer micro surface contours, which are normally far beyond the resolving power of a laser microscope. Thanks to its DIC laser mode, the LEXT OLS4100 allows you to obtain live images comparable to those of an electron microscope under relatively low power magnifications. |
| |
|
 |
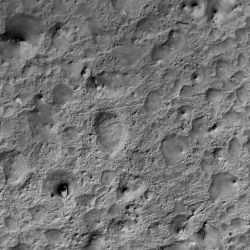 |
| Laser Image with No DIC (Polymer Film) |
Laser Image with DIC (Polymer Film) |
| |
|
 |
 |
| Laser Image with No DIC (5x Objective Lens)
STEP Height standard Type B, PTB-5, Institut fГјr Mikroelektronik, Germany |
Laser Image with DIC (5x Objective Lens)
STEP Height standard Type B, PTB-5, Institut fГјr Mikroelektronik, Germany,
Actual Height of the Feature : 6 nm |
| |
|
| Optimized Balance Between Brightness and Contrast, HDR (High Dynamic Range) Imaging |
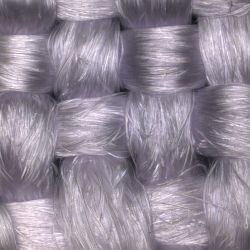
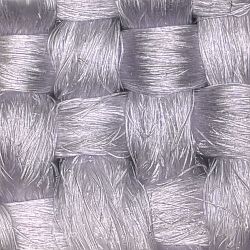
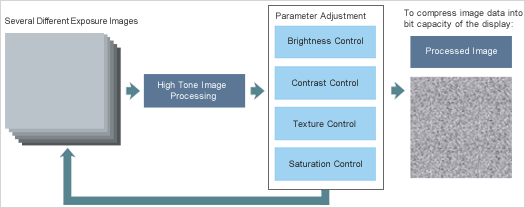
| The OLS4100's High Dynamic Range (HDR) function combines several optical microscope images taken at different exposures and it controls brightness, contrast, texture, and saturation individually so that HDR processes images with a wide dynamic range. The OLS4100's HDR enables to visualize clearly the color image of especially a sample with less texture. |
 |
 |
Color Image without HDR
(Super-Density Fabric, Objective Lens 20x, Zoom 1x) |
Color Image with HDR
(Super-Density Fabric, Objective Lens 20x, Zoom 1x) |
| |
|
 |
| Algorithm |
|
| |
|
| Stabilization of Measurement and Imaging Environments |
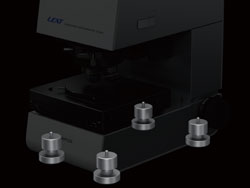 |
eliminate external influences on measurement and imaging, the OLS4100 incorporates a hybrid vibrationdampening mechanism using coil springs and dampening rubber to stabilize the operating environment. This eliminates the need for a dedicated vibration-dampening stand, allowing measurements on any desktop. |
| Hybrid Vibration-Dampening Mechanism |
|
| |
|
| Systematic Workflow via Intuitive GUI |
| Easy Three-Step Process |
| With the LEXT OLS4100, you can start observation/measurement immediately after placing your sample on the stage. Thanks to an easy three-step process-Imaging, Measurement, and Reports-you can quickly master measurement procedures even if you are not familiar with laser microscopy. |
 |
| |
|
Always Know Where You Are on Your Sample
Macro Map Functionality |
| The OLS4100's macro map function allows you to display a wide-field image of your sample under low magnification, with a rectangular observation marker on the macro sample image. The field of view can be set up to 21 times wider than the conventional view. When used together with the motorized six-lens nosepiece, the macro map function allows smooth, convenient, one-click operation for stage movement and magnification. Accurate parfocality and objective lens centering can be preset and synchronized with one-click stage movement and magnification. |
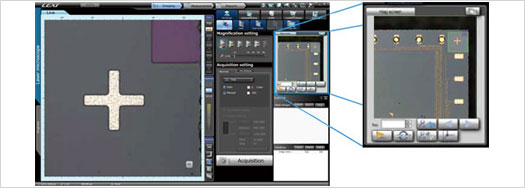 |
| |
|
| Fast Macro Map Stitching |
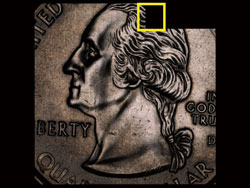 |
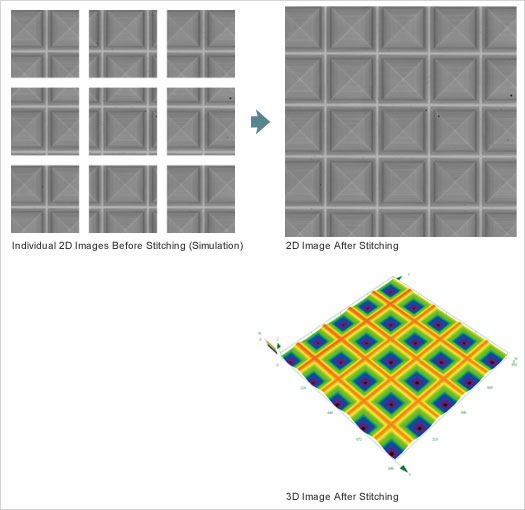
Two stitching methods are available for scanning large areas: Manual mode for live image acquisition and Automatic mode for quicker image acquisition. Operation is quick and simple-2D stitching starts automatically at the touch of a single button, and wide area images are acquired immediately. The stitching size is available from five steps in 3x3, 5x5, 7x7, 9x9, and 21x21 in Automatic mode. Unnecessary parts of the acquired images can be removed manually with simple mouse/joystick operation. |
| |
|
Smart Scan for Simple 3D Imaging
Automatic 3D Image Acquisition |
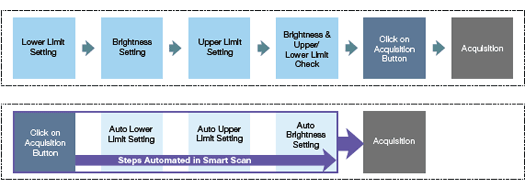
| Conventional 3D scanning requires complicated settings that are difficult for novice users. With the LEXT OLS4100's new Smart Scan mode, even first-time users can quickly acquire 3D images with a single click of a button. In addition to upper and lower limit settings, appropriate brightness level is automatically set up by the system based on the image to be captured. This allows even a first time user to obtain accurate height measurements and an optimized image. |
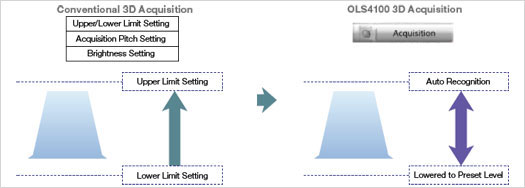 |
| |
|
| Automatic Brightness Control |
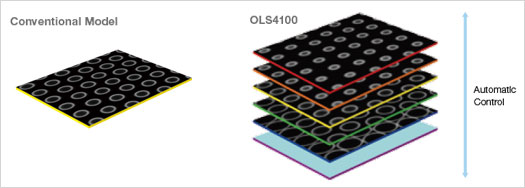 |
| Brightness Control on a Plane |
Brightness Control with a Range of Height. |
| |
|
| Greater Reduction of Acquisition Time |
 |
| |
|
| Improved Scanning Speed |
| The new Ultra-Fast mode allows you to acquire scanned images twice as fast as with the conventional Fast mode, and approximately nine times faster than with the Fine mode. This makes it possible to measure micro samples with very steep angles, such as the tip of a knife that's hard to observe due to fine Z-step movement and high magnification. |
| |
|
| Number of images acquired in the same amount of elapsed time: |
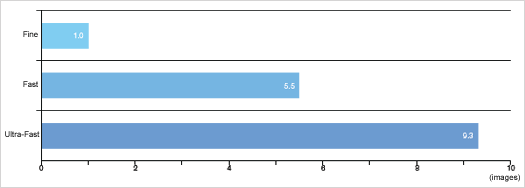 |
| Actual scanning time varies depending on magnification in use and Z-acquisition range. |
| |
|
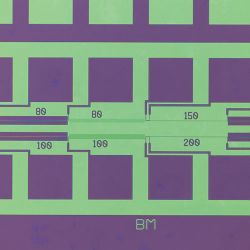
| High-Speed Acquisition of Required Areas Only |
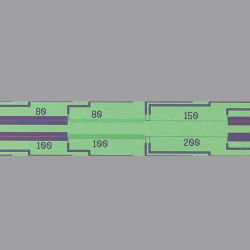
| The OLS4100 also comes with a Band Scan mode for measurement of limited target areas, providing measurement performance 1/8th faster than conventional modes. |
 |
 |
| Acquisition with a Full Scan |
Acquisition with Band Scan (1/8th ) |
| |
|
New High-Speed Stitching Mode
Specify Target Areas from Wider-Area Stitched Images |
| As in macro mapping, the area to be observed can be specified from a wide area map. In Automatic mode, an area map can be automatically generated in roughly half the time it normally takes by setting a rectangular stitching size of up to 625 images. Next, specify the target area required for images on the area map and start observation immediately. |
 |
| |
|
 |
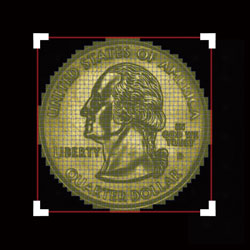 |
| Stitching Area: Square (21x3) 63 Pieces |
Stitching Area: Circle (3 Points) |
| |
|
| Manually Specifying Required Image Areas |
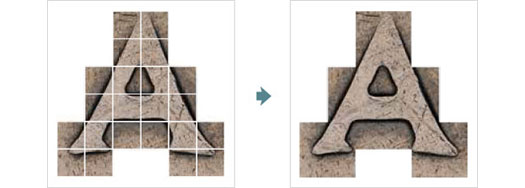
| In Live mode, the area to be observed can be selected manually by tracing the required areas on screen. This is convenient when the sample to be observed has an irregular shape.
|
 |
| |
|
| Quick Image Acquisition |
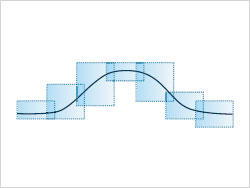
| To use Smart Scan mode for image acquisition, all it takes is the click of a button. As the setting for Z-axis direction is automatically adjusted in Smart Scan, image acquisition in the Z-axis direction can be restricted to required areas only, saving a tremendous amount of time while using high-power observation across a wide area. |
 |
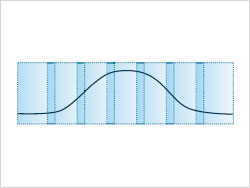 |
| Smart Scan Mode |
Conventional Acquisition Mode |
| |
|
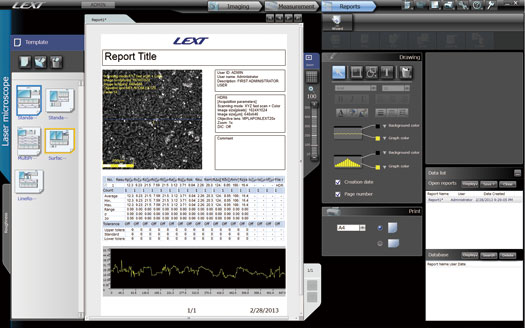
| Customizable Reports with the Push of a Button |
| The OLS4100 generates reports with the push of a button after measurement, and an edit function allows the operator to customize each report template. Copying and pasting measured results to a word processing/spreadsheet application is also quite simple, as is retrieving required images/reports from a database. |
 |
| |
|
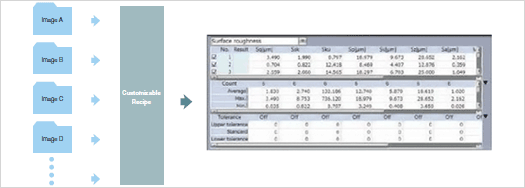
| One-Click Solutions for the Goals |
| A detailed user-designed wizard function eliminates the need for lengthy training and allows quick and easy operation by new operators. |
 |
|
|
|
|
|
|
| |
|
