|
The DSX500 is a high-resolution upright motorized microscope with 13x zoom optics. The DSX500 ensures the superior results for any experience level with it's superb operating simplicity and absolute performance reliability.
к°ңмҡ”
Operating Simplicity Lets Even the Inexperienced Observe Samples They Couldn't Before
The leading-edge digital technology of this microscope lets you see more than any other microscope can. Heretofore, only experts with years of experience could adjust microscopes to achieve really good views of relevant samples. But DSX500 allows any operator to do that with a GUI screen. Now all it takes is a touch of the finger to follow a few easy steps to get exact output from inspection to diagnosis to pertinent reports.
Best Image Function Ensures Optimum Microscope Performance
Best Image - Just choose the image you want from the previews on the screen |
Now you can operate your microscope just by choosing, and leave the inspection method up to the microscope. That ensures the best possible image, whether looking for defects, uneven surfaces, or foreign objects. Anyone can operate the system, beginner or expert, and it can be customized for operator or operation. Put the inspection methods in memory, and whoever operates the scope will get the same results; no scattering. |
HDR Gives Ultra High-Definition Visuals That Go Beyond the Human Eye
Dark-field risks blackout and bright-field risks halation, but the HDR (High Dynamic Range) function of DSX500 scopes synthesizes several images taken at different exposures to eliminate such problems. HDR promises high-fidelity images in which textures stand out and there is no halation, so defects that were undetectable now stand out.
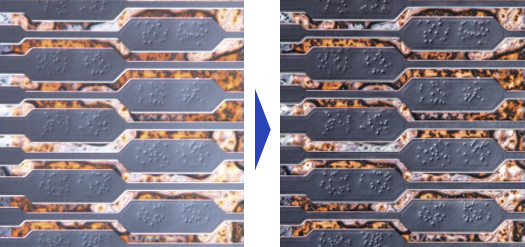
HDR - enables ultra high-definition inspection in dark-field and DIC images with one click
WiDER Provides Easy Inspection of Samples with High Luminance Difference
If the shadowed areas black out, merely upping the illumination power is often not enough, because then halation occurs. Olympus intelligent image processing technology eliminates these problems with WiDER, a proprietary system ready to go at the click of a button. It takes care of the high contrast problems without reducing the frame rate. No blackouts. No halation.
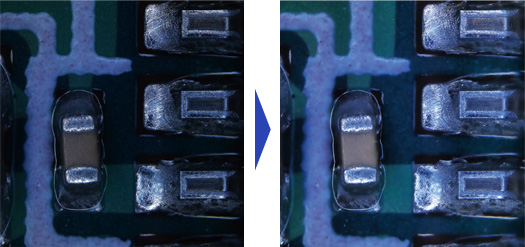
When high contrast problems occur, a click lets you see everything in real time
Change Observation Methods with One Click - No Presetting Necessary
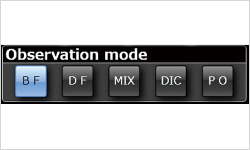
A click of a button gives you the image you want on screen |
With virtually every industrial observation method at hand, it's easy to choose the proper one for the current task. Just choose the proper method with the click of a button. No complicated adjustments needed. |
Various Observation Methods with Simple Operations.
Quickly Achieve the Image Definition You Need for Observation
Can be used for any industrial microscopic observation method. Also, a new MIX observation method combines BF and DF. Where experts had to conduct observations before, now pressing a single button changes the image on screen, and you get the high-resolution images expected of high-end optical microscopes.
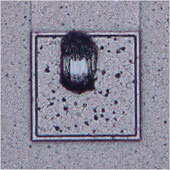
BF
Bright-field observation. The most common method with optical microscopes.
|
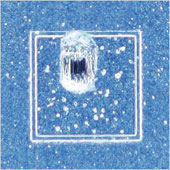
DF
Dark-field observation. Illuminate from the side to emphasize imperfections. Best method for identifying defects.
|
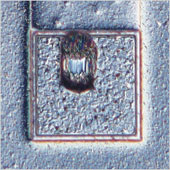
DIC
Differential Interference Contrast observation. The method to use when inspecting uneven surfaces.
|
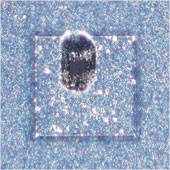
PO
Polarized light observation. Used to inspect copper lines through a polarized filter.
|
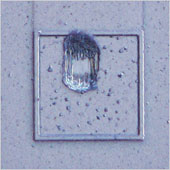
MIX(BF+DF)
While observing samples with the bright-field measurement method, you can detect defects and imperfections without switching back and forth between bright-field and dark-field images.
|
|
A Simple Operation Lets You See Now What You Couldn't See Before
The DSX500 requires no extensive knowledge or special techniques to show you exactly what you want to see. By calling on leading-edge electronic technology, you can now see what was unclear or impossible before. Of course, there are no difficult processes either. Just press the buttons on the menu to see what you want.
Panoramic Photos Include Areas beyond the Field of Vision
Panoramic photo |
No such thing as "outside the field of vision." Just move the observation position on the screen, and the motorized stage will move the sample to that place. As the stage moves, the system automatically stitches images into a single large field of view, in real time. Where conventional microscopes reduce field area with increases in magnification, Panoramic View maintains the original field while giving close-up clarity- with 2D, expanded focus, or 3D, or any
combination of one or all. |
3D Photo Feature Shows the Sample as It Actually Is
3D measurement - The click of a button turns the visual into 3D |
Inspect or observe the sample as it is, because DSX500 can easily show it in three dimensions, and you can examine it from any angle. |
EFI Capabilities Show Everything
Even when using dark-field or DIC images focus is automatically maintained across the field of view |
Where conventional microscopes can focus only at one place, DSX500 Extend Focal Image (EFI) maintains focus across the entire target surface area. This makes uneven surfaces easy to inspect. |
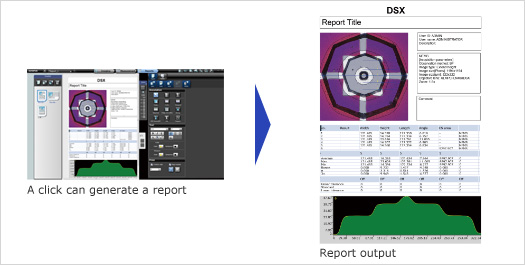
The Report Function Gathers the Results Together Efficiently
With DSX500, you can do observation or measurement, and the operator's workflow includes preparation of relevant reports that can be output in rich text (rtf), or PDF formats.
Color Enhancement Feature Shows Only What You Want to See
If you put what you need to see in color and leave the rest inmonotone, it's much easier to find defects, if any exist. And you can photograph just that part, too, which makes reports even more effective.
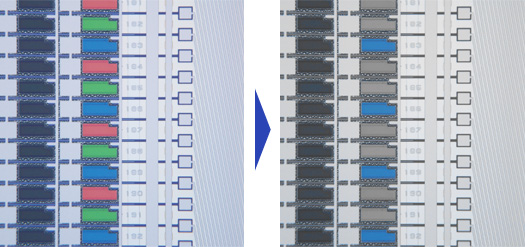
Inspection is easier when you can highlight possible defects or contamination for inspection
DNA from Olympus Gives DSX Microscopes the Ability to See What Digital Microscopes Cannot
Olympus guarantees the reliability of all DSX500 microscopes because they are born of Olympus optics and opto-digital technology. Halation is minimal and color reproduction is real. And to make sure of that, Olympus uses the perfect combination of CCD chips and graphic boards. The sample is reproduced with such accuracy it's like a new dimension.
Ultra High-Quality Optics Let You See Into Another Dimension
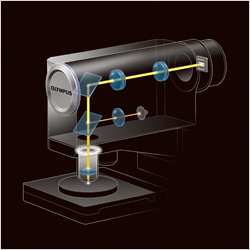
The optics technology and dedicated lenses - complete with Olympus DNA |
Olympus DNA includes superior engineering and design capabilities as well as proven manufacturing quality. In the clear images produced by the DSX500 opto-digital microscope, you'll find neither flare nor distortion. That's something no digital microscope can claim. |
Dedicated DSX500 Field Lenses Make High-Grade Image Dissection a Simple Matter
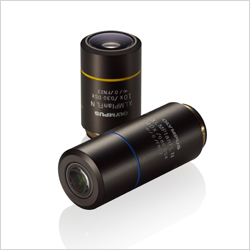
The optics technology and dedicated lenses - Complete with Olympus DNA |
These new lenses were especially designed and manufactured for DSX500 10x and 40x scopes. And they put high NA and long working distance together. Just zoom in electronically, and suddenly you've got extremely high resolution. On samples with very rough surfaces, high-resolution observation is simple and reliable. What's more, you can use UIS2 lenses, which provide high resolution and contrast. |
18MP Images Reproduced in very High Resolution with High-Performance CCD*
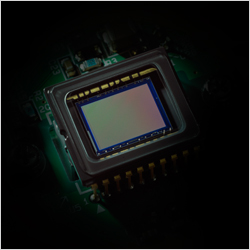
High-performance CCD |
As the engine that shows exactly what the high-quality optics reveal, exceptionally high-performance CCD reproduces the colors precisely. The image shift function ensures very high fidelity with fine detail processing of images, so the detail clarity extends from corner to corner.
*4800x3600 pixels, 3CCD mode conversion triples the pixel count |
LED Illumination Gives Picture-Perfect Inspection with Much Less Energy
New LED illumination not only assures accurate observation, but also achieves both energy conservation and lower running costs. What's more, the light color temperature does not change with intensity. And the long working life of the elements means the scopes are virtually maintenance free.
Precision Measurement with Absolute Reliability that Cannot Be Matched by Conventional Digital Microscopes
DSX500 scopes show Olympus' dedication to accurate measurement with its telecentric optics and frame design. The measurement capabilities are far and away more accurate than digital microscopes, with much greater reliability. The measurements are accurate and consistently repeatable, the test for reliable accuracy, always.
Accuracy and Repeatability Guaranteed
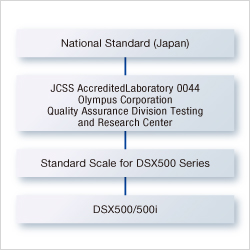
A traceability diagram from a DSX500 series opto-digital microscope |
The DSX500 provides precise and repeatable measurements. Everything from an objective lens to the frame is manufactured in an Olympus factory under strict inspection criteria. The accuracy is guaranteed under the traceability system connecting to national standard.
*Calibration by Olympus or dealer specialists necessary |
Auto-Calibration Eliminates Setup Scatter
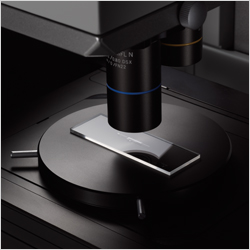 |
Proper calibration is basic to precise measurement, and with Olympus DSX500, any operator can calibrate simply and accurately. This eliminates scattering that naturally comes when different operators calibrate, and naturally increases reliability of readouts. In addition, the system's calibration report shows who did the calibration and when.
*A special calibration sample is necessary |
Long List of Measurement Items Include Both 2D and 3D Choices
Any DSX500 microscope comes equipped for both 2D and 3D images. That means you can measure along the X,Y axis, or along X, Y, and Z axes. Observe, inspect, or measure from any angle. And the result of inspection can be reported by the same application.
Mechanized 2D measurement: Automatic measurement of circles and rectangles
Geometric shapes and angles on screen can be measured automatically. The main measurement items are between 2 points, parallel width, circle center distance, rectangles, 3 point set angles, circles, etc.
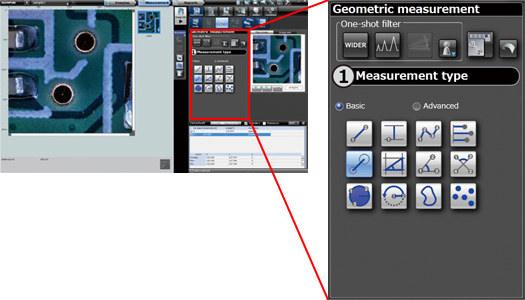
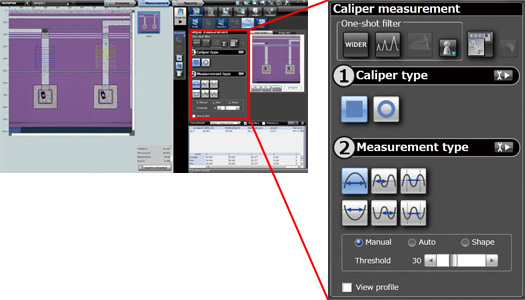
Caliper measurement (Option): Can handle rectangles and circles.
Measurements for rectangular or circular calipers specified on the image can be measured automatically.
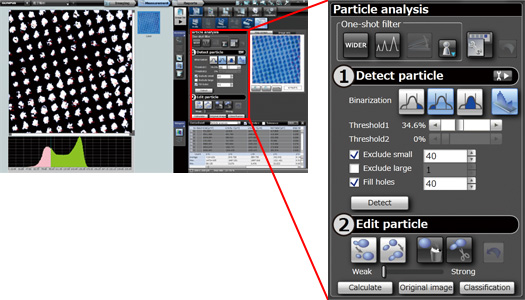
Particle analysis (Option): Automatic analysis of particle shape from image
The image is binarized and the area extracted from the image can be measured automatically. Threshold setting, such as small particle removal, large particle removal, and fill-in is possible.
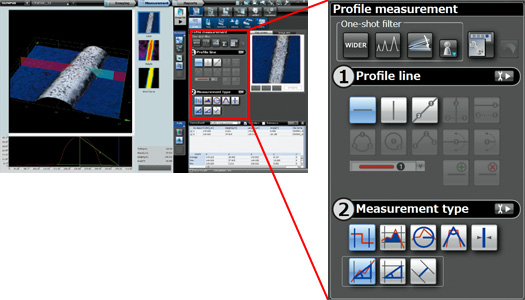
Profile 3D measurement: Automatic measurement of cross section area and curvature, etc.
By specifying a measurement line on screen, profiles such as length, line width, cross section area, curvature, and intersecting angles can be measured automatically.
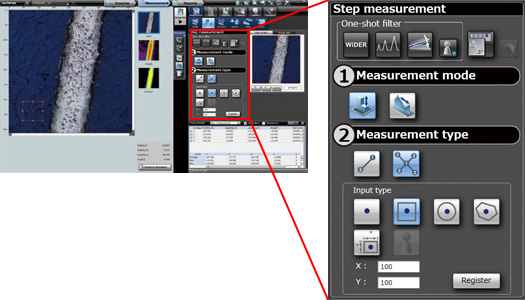
3D Step measurement: A level difference is measured by easy operation.
The distance of the height direction can be measured by specifying the point of measurement on a picture. It can also measure using a height histogram. *Level difference measurement requires the image data by which 3D photography was carried out.
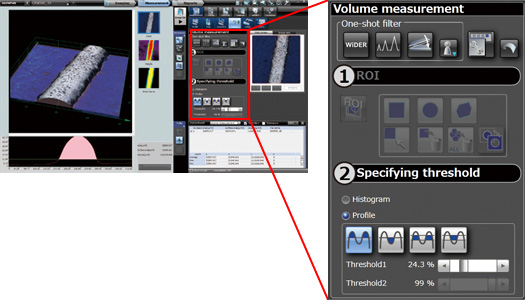
3D Area and Volume measurement: Surface area can also be measured automatically.
The area, volume and surface area of the region specified on the 3D image can be measured automatically. The threshold for measurement can be specified by histogram or by profile.
Low Center of Gravity, Sturdy Frame, and Vibration Compensation Ensure a Steady Observation and Measurement Environment
The low center of gravity and sturdy frame of DSX500scopes give sufficient stability for inspections at high magnification. Furthermore, vibration compensation absorbs any vibration that might affect inspection or measurement at high magnification and adjusts for any vibration-caused blur in 3D images.
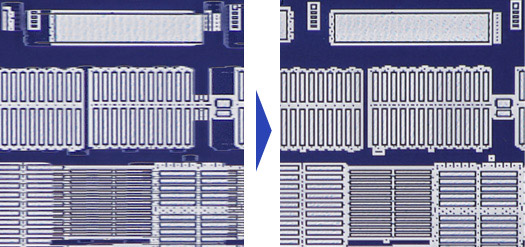
Without compensationгҖҖгҖҖгҖҖгҖҖгҖҖгҖҖгҖҖгҖҖгҖҖгҖҖгҖҖгҖҖгҖҖгҖҖгҖҖгҖҖгҖҖгҖҖгҖҖгҖҖгҖҖгҖҖгҖҖгҖҖгҖҖWith compensation
Telecentric Optics Ensure Precise Dimension Measurement
With telecentric optics, the size of the image does not change with changes in focus position, something digital microscopes don't have. What's more, trained staff personnel check every scope upon delivery to make sure everything is right.
OLYMPUS Stream Can Analyze DSX500's Data
Metallographic evaluation, such as granularity analysis, is done with OLYMPUS Stream, an image-analysis program.
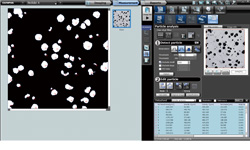
Particle analysis |
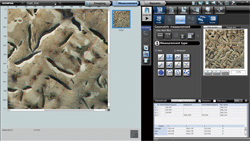
Cast-iron analysis |
мӮ¬м–‘
| DSX500 Specifications |
| Main frame |
Zoom ratio |
13.5x optical zoom (0.26X-3.5X), 30x with digital zoom |
| Nosepiece (Manual) |
No. of objective lens |
Max 2 (restriction applies) |
| Mountable objective lens |
DSX dedicated
objective lens |
XLMPLFLN10X,XLMPLFLN40X |
UIS2 objective
lens |
MPLFLN1.25X,MPLFLN2.5X,MPLFLN5XBDP,MPLFLN10XBDP,
MPLFLN20XBDP,MPLFLN50XBDP,LMPLFLN10XBD,LMPLFLN20X,
LMPLFLN50X,MPLAPON50X |
| Illumination |
Embedded standard |
Bright field: LED, Dark field: LED |
| Optional illumination |
High intensity LED *1 / Transmitted LED |
Camera |
Image sensor |
1/1.8 inch, 2.01 megapixels, Color CCD (Total pixels : 2.10 megapixels)
Total pixels : 1688(H) x 1248(V)
Available pixels : 1628(H) x 1236(V)
Effective pixels : 1600(H) x 1200(V) |
| Cooling method |
Peltier cooling |
| Scan mode |
Progressive scan |
| Frame rate |
15fps / 27fps with binning mode |
| Image resolution |
Normal : 1194Г—1194(1:1) / 1592Г—1194(4:3)
Fine : 1194Г—1194(1:1) / 1592Г—1194(4:3)
Super fine : 3594Г—3594(1:1) / 4792Г—3594(4:3) |
| Sensitivity |
ISO100 / 200 / 400 / 800 / 1600 equivalent |
| Focusing part |
Stroke |
95mm |
| Resolution |
0.01Ојm |
Maximum
specimen height |
DSX |
65mm |
| UIS2 |
95mm |
| Stage |
DSX-UFSSU (Motorized) |
Stroke |
100mx100mm |
| Load capacity |
3kg |
U-SIC4R (Manual) |
Stroke |
100x100mm |
| Load capacity |
1kg |
| LCD monitor |
Size |
23" with Touch panel and Full HD color LCD monitor |
| Resolution |
1920(H)x1080(V) |
| Weight |
Approx. 38.6kg (Main frame, Motorized stage, LCD Monitor, Control box, PC) |
| Input rating |
100-120V/220-240V, 185VA, 50/60Hz |
|
